2D Animation with Blender
Blender is a lot of fun to design with.
While it's a super complex tool that has roughly 2 bajillion parameters to adjust, with a small amount of knowledge you can explore a lot of interesting things with a fairly rapid feedback loop.
Here is a sample Blender file. What we are doing here is applying a material shader to a 2d plane. Shaders are VERY COOL and I think a lot of the future of design tech will resemble at least conceptually, shaders. The Book of Shaders is a great resource if you haven't read it yet.
To start off you will want to navigate to the shaders panel which is creatively called 'Shading'. This is where I do all of my work currently. Note: make sure you have the right most sphere icon selected. This will set the viewport shading to the correct setting so you can preview changes in the viewport.

You should be able to see this panel, called the Shading Editor, below the main viewport.
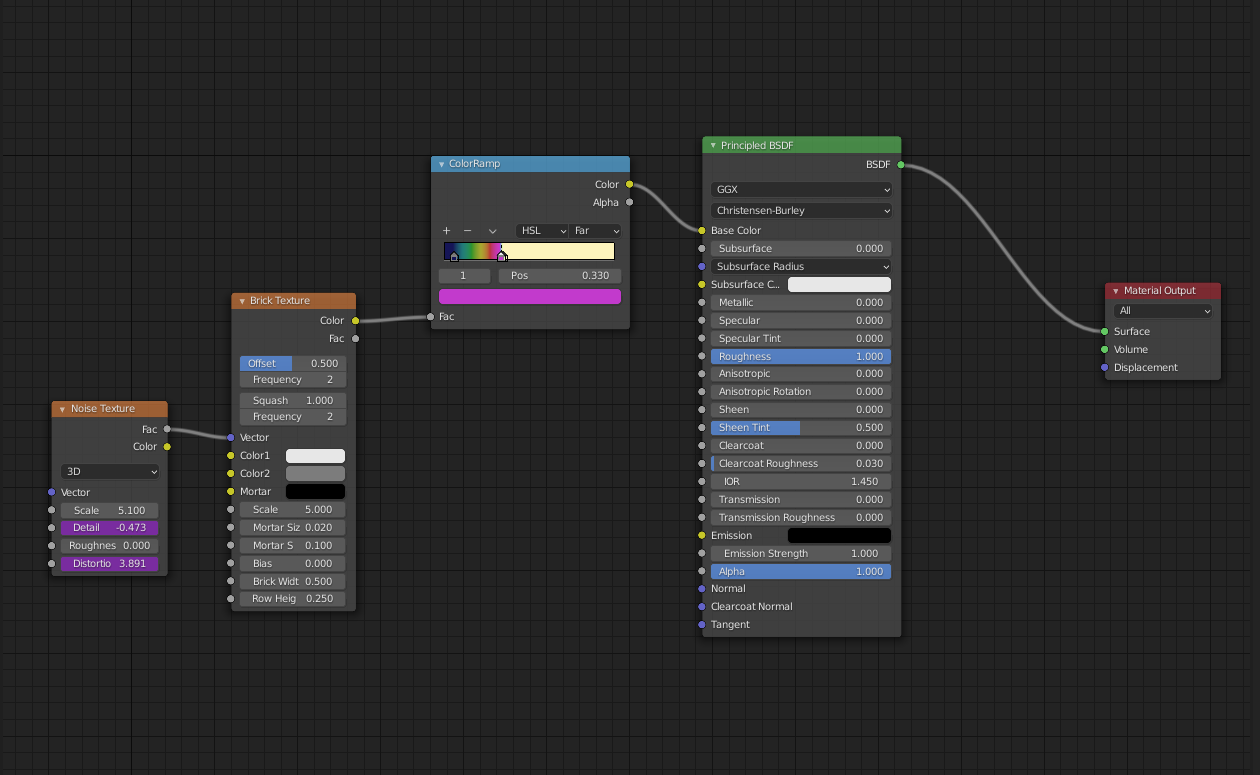
The part in the above to focus on would be noise and brick textures. To start to experiment you can drag the noise output connection at the Vector input on brick texture to any other parameter on the brick texture node.
We can start by dragging the Noise output to the Color1 input:
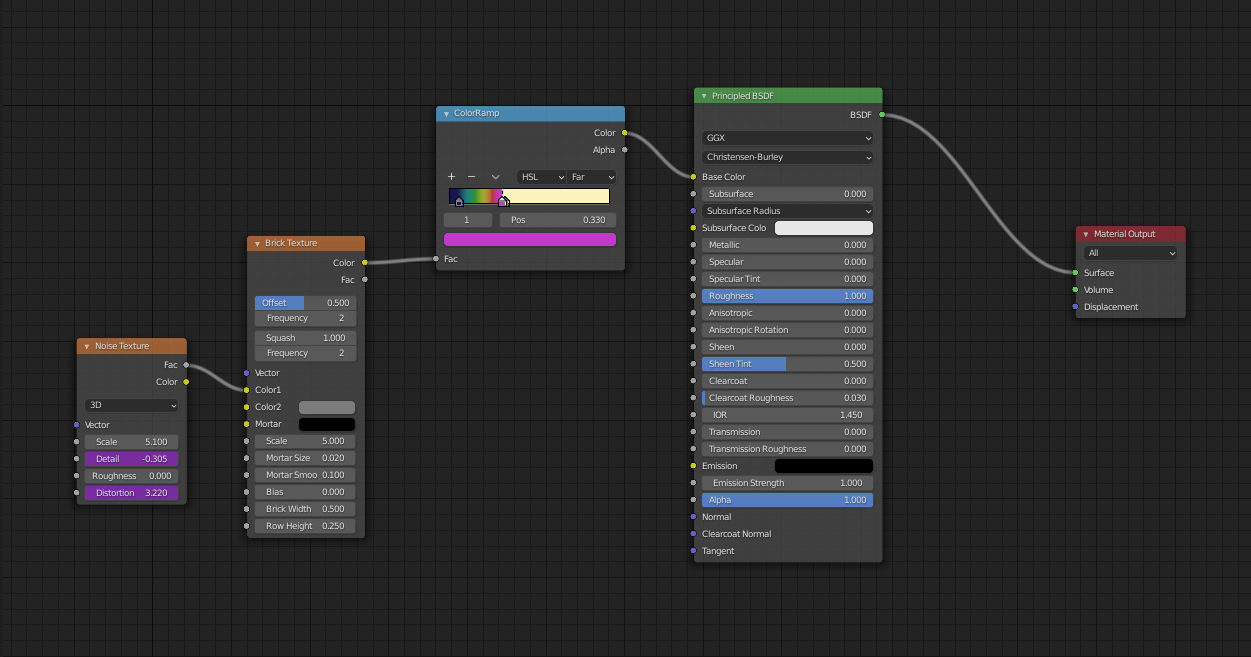
This change will alter our animation to look like this. This definitely looks like bricks now.
We can then try to move the Noise Texture output to the Scale input.
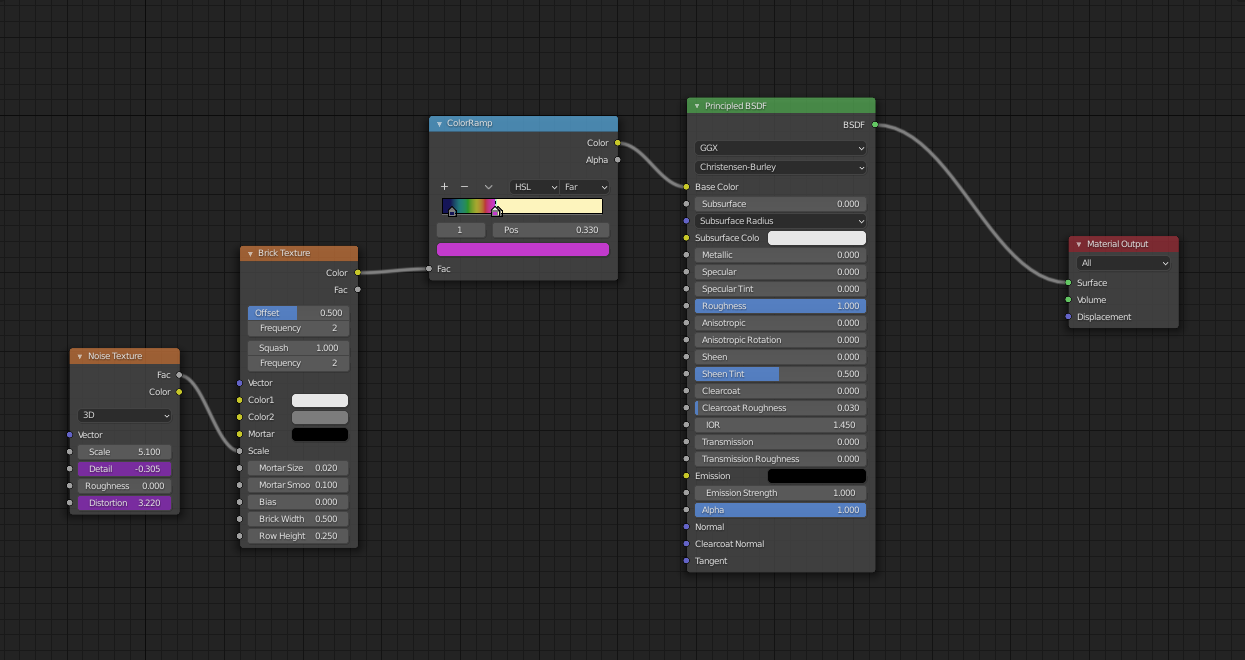
This will produce the below animation that does not closely resemble bricks.
Experiment with other combinations of textures from the Add menu available at the top of the shader panel, or available by pressing Shift+A

You can chain a lot of nodes together to make some very complex visuals. But you can also get some pretty funky stuff just combining 2 or 3 nodes together. Color Ramps are used to customize the color output. Experiment with connecting Color output directly to Base Color to see defaults.
Brick, Checker, Gradient, Magic, Musgrave, Voronoi, and Wave textures offer endless amounts of fun visuals to explore.
Animations & Drivers
The purple highlighted parameters are known as drivers . These change a value over time. Here we use frame count and some math to make a perfect loop over 480 frames (16 seconds): sin(frame/154) * .5 + 1
Adjust the multiplier and starting point to test different value ranges for parameters.
You can cut and paste drivers across parameters or nodes. Don't be afraid to tweak the values in the drivers. Much of procedural animation is learning which ranges you want to animate, and learning which parameters do what. Drivers are what makes things animated, but animation isn't a requirement. You might find use in just sliding parameters around yourself to produce a single image.
Pressing spacebar to start and stop the animation preview. CTRL+F12 renders out an animation - this is also available in the top app nav.
Render output settings can be found in the scene tab (right hand side of below image). Some people render out images for each frame and combine them into a video. This setup will give you an MP4 that should work for everything from posting to Twitter to texting your friends cool animations.

While there are a lot of other concepts to explore in Blender, this should be enough to start making a wide variety of fun animations.
Have fun rendering!