3D Animation with Blender
If you missed it, check out the intro to creating 2D animation loops with Blender .
While 3D might look much more complex, the principles are the same. We can take color data that is generated from a material shader and we can use it to drive the bump and displacement on a 3D object.
Setup
Here is a template for creating 3D animation loops . This is the default output from the template.
Download the file and open it Blender. You'll need to adjust the viewport shading method to the render view if you want to see a 3D preview of the scene. This can be found in the top right section. The render preview is the icon on the right hand side. By default when you open a Blender file this preview option is not selected.
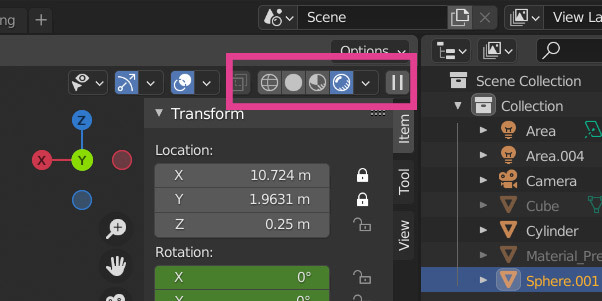
Viewport shading options
Shader Node Tree
This is a screenshot of the shader node tree we are applying to the sphere object. The only difference from a 2D material shader is here we are applying the same output to a displacement node, and connecting that to the Displacement parameter of our Material Output node.
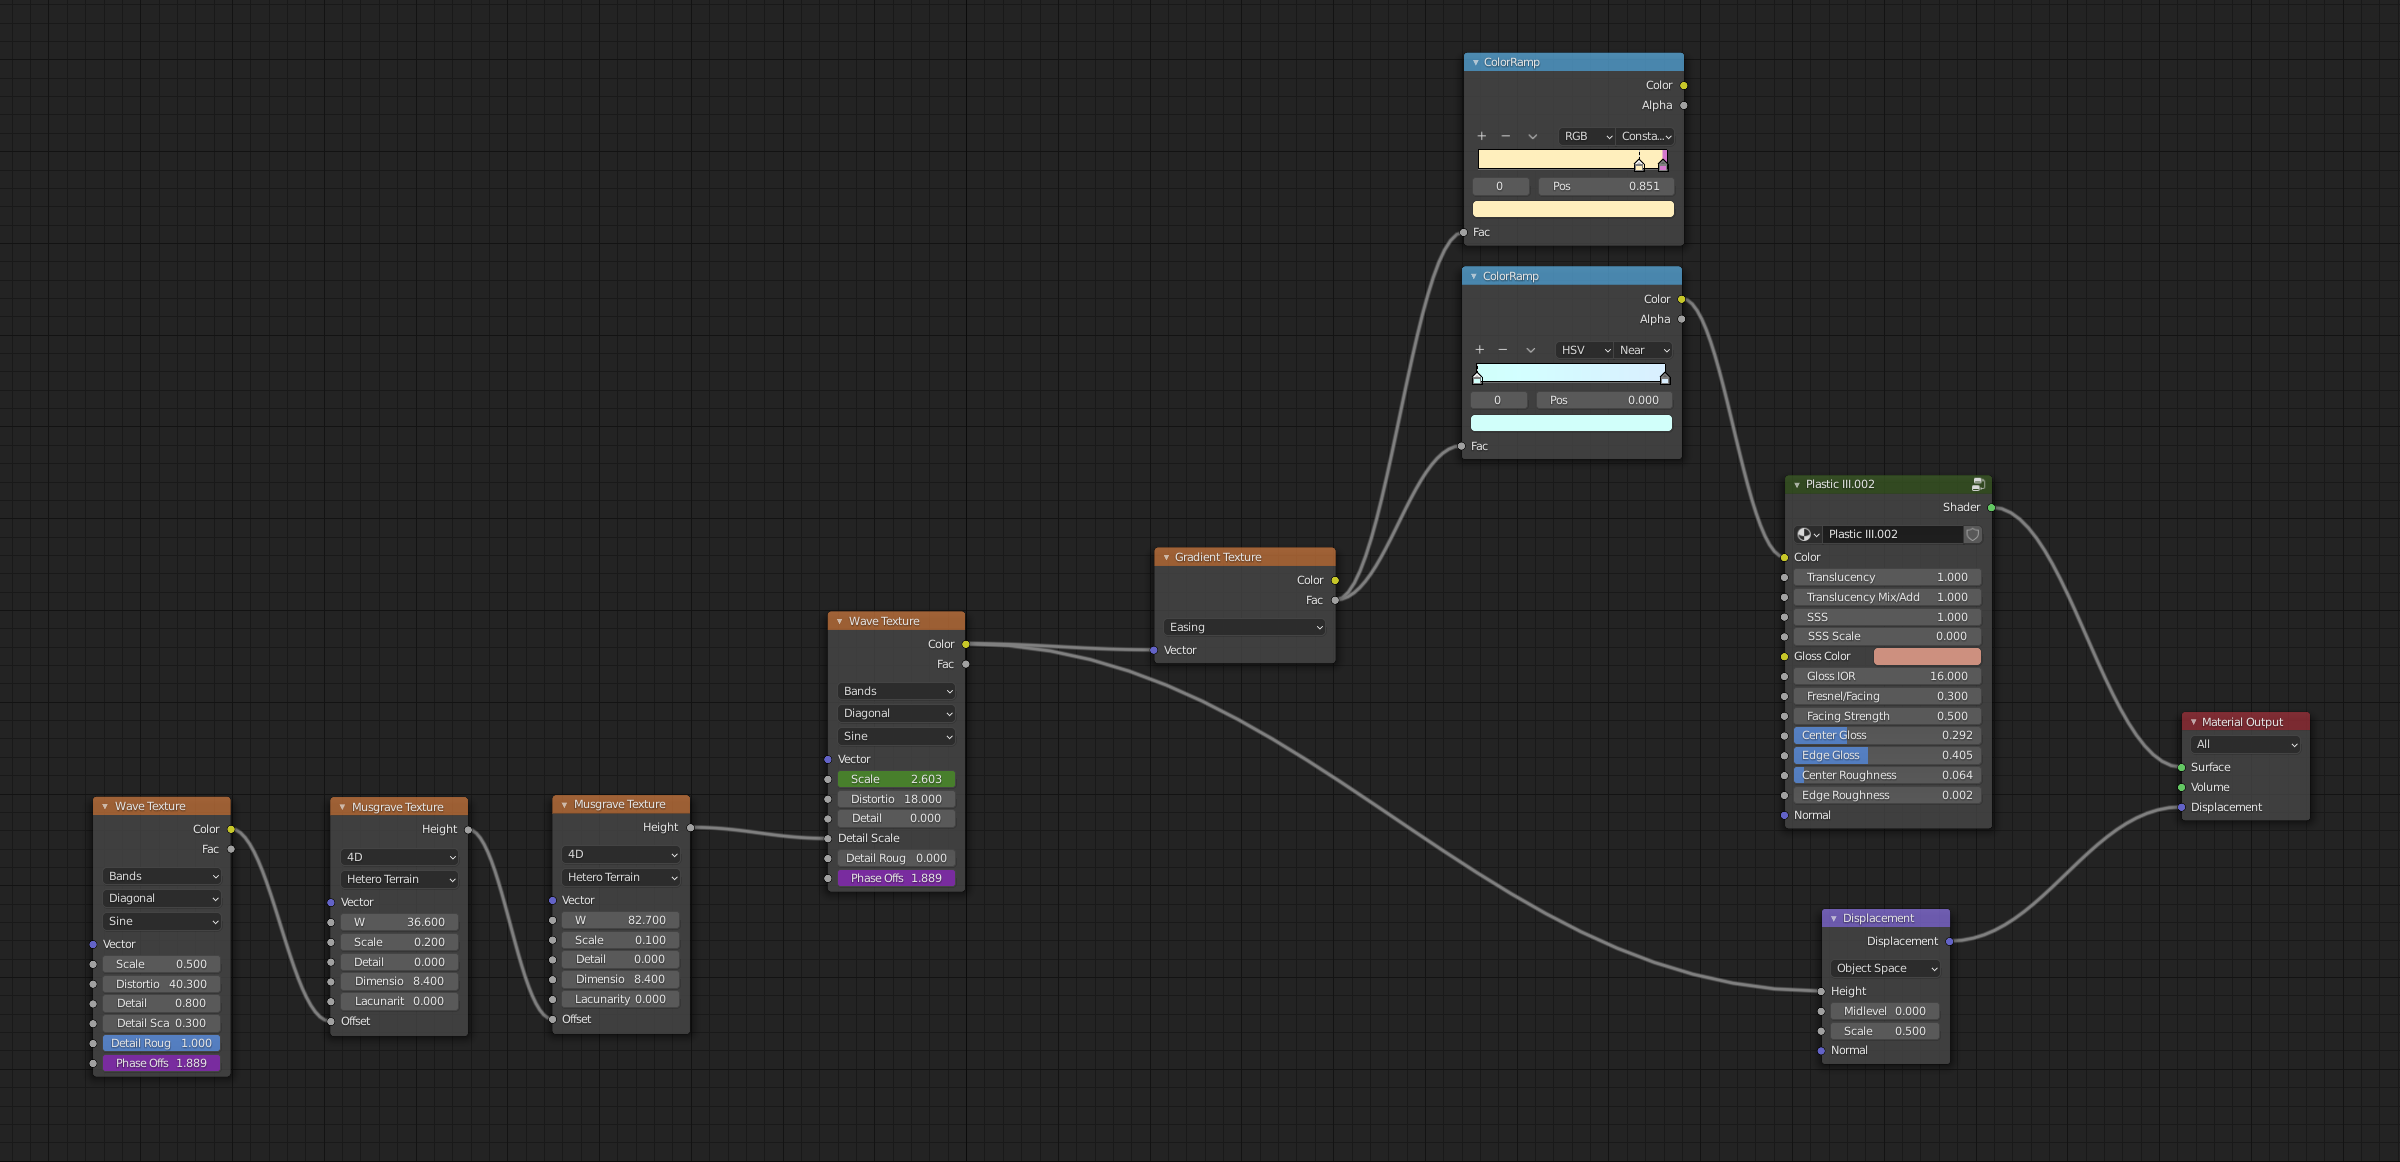
Each Wave Texture node features a driver that's used to cycle through a phase offset that perfectly loops through the wave cycle over 480 frames: (frame - 1) / 479 * 6.2832
This method can be used to drive loops in values for any texture parameter. It's an alternative to using keyframe animations or applying a driver to a specific parameter.
By simply adjusting the w parameter on Musgrave Texture nodes and using a different Color Ramp, we can generate the below animation.
Experiment with adjusting the color ramp colors and positions. Adjusting the gradient texture function will affect how colors are mapped across the shape. You can also experiment with removing it completely from the chain.
Finally, we use a keyframe animation to rotate the sphere 360 degrees over 480 frames. Note: When a parameter is highlighted in green, this indicates the value is being driven by a keyframe animation. You can experiment with changing the axis the spin is applied to, the interpolation method, and the direction of the spin.
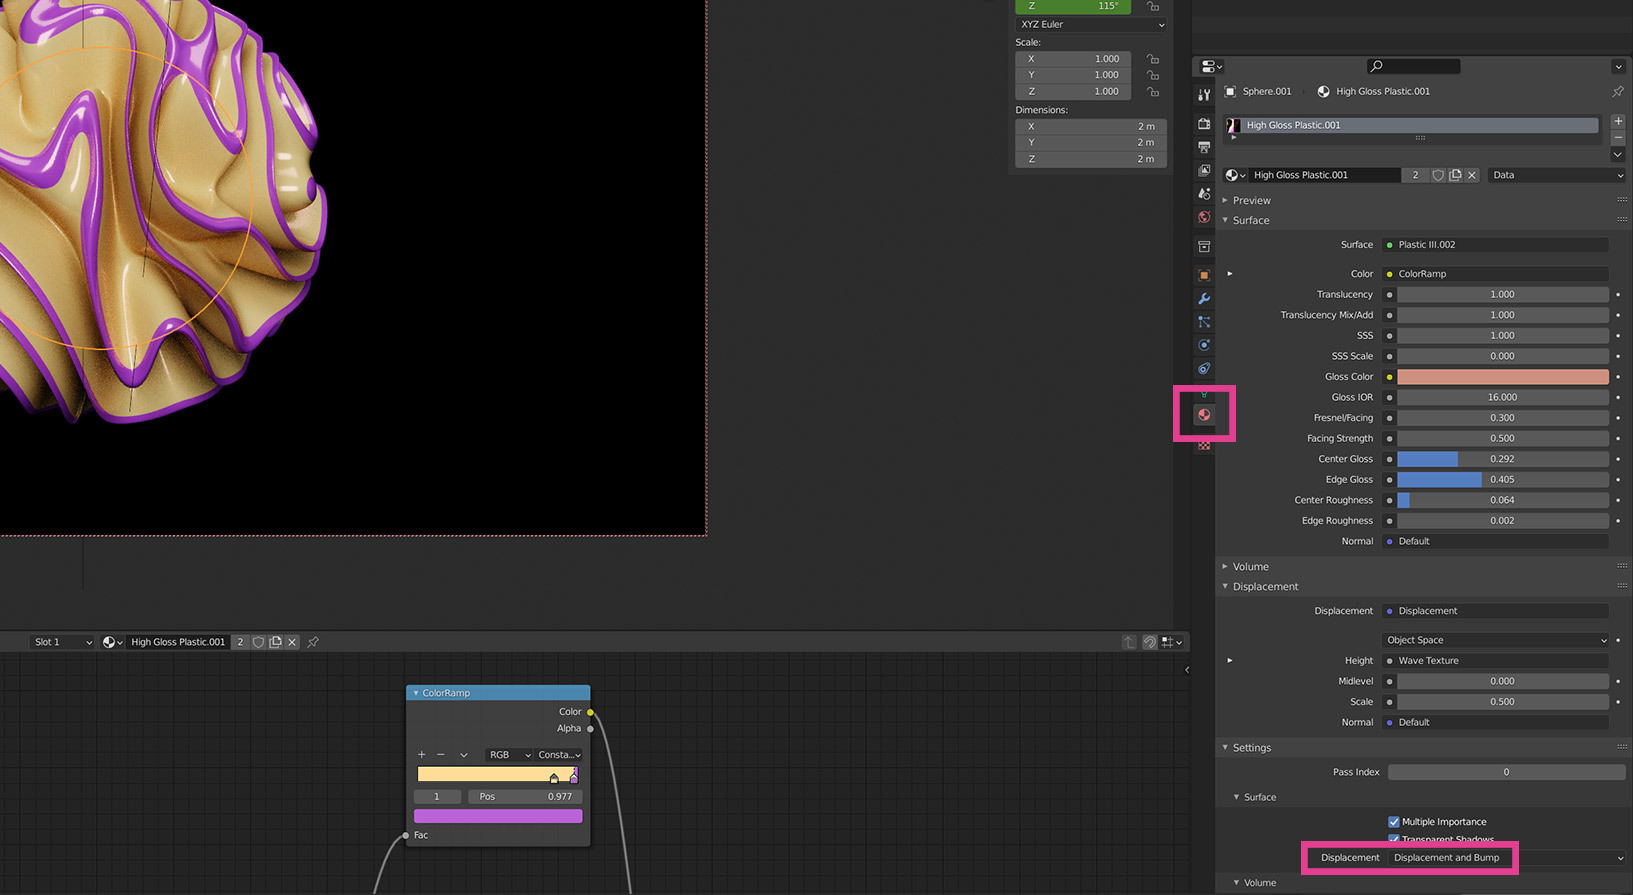
Displacement and Bump
If you want to experiment with using material shaders to drive bump and displacement on other mesh objects, you'll need to adjust one default setting. You'll need to update Material Settings -> Settings -> Surface -> Displacement to Bump and Displacement. This setting is only available in the Cycles render engine.
Finally, to render out a video animation press CTRL + F12 or select Render -> Render Animation from the top app menu.
Happy rendering!